Hi all!
I'm sorry I have not written a blog post in some time, I'm currently very poor, and haven't really purchased new clothes and therefore haven't really had much motivation for blogging. I've had a lot of icky personal things going on in my life, and I've been rather depressed. But onto the blog post!
If you know me at all, you know that I am studying to teach media in high schools, and whilst I'm at university, I get plenty of practice in schools and must act like a qualified teacher should. Ever since I started my course, I'd been worrying about not being able to look like 'myself' in schools because I wanted to be taken seriously by my supervising teachers.
Looking and feeling good is important to me in a teaching environment, and believe it or not, what you wear does reflect on the kind of attitude the students give you.
I know my classes used to judge my English teacher because she wore almost the same thing every day, and were put off by her "old" clothing.
So my dilemma lately, is trying to work out how to combine my love of vintage, without looking "old" and (I know, sounds stupid) being "uncool" to the kids; because believe it or not, it makes a difference, and I put an emphasis on being able to communicate with my students at a slightly the same level as them.
Unfortunately, I've not had much inspiration of ways of combining my clothing
I have almost never worn vintage out on placements because I pretty much raided target one day because I remember that's what a lot of my teachers in high school wore; I came out with a couple of pairs of tailored pants, and several blouses, my future-mother in law bought me several adorable cardigans, and a tailored pencil-dress. Unfortunately, as I wear a lot of vintage and vintage inspired dresses, pants make me very uncomfortable, and I shall roll over and die before I wear jeans in public. I also wear my hair up in a french twist or a pony-tail (which is so mind-numbingly horrible I feel so sluggish doing it), which looks nice but doesn't frame my face nicely, but I find is quite nice for all the leaning over I have to do.
My question to my little bloggy readers, is this:
How do I look lovely, (and feel lovely and therefore will be happier at work) whilst being comfortable, easy to move around in, and be acceptable for work all whilst using my love of vintage and vintage inspired clothing?
I'd appreciate some feedback! And don't tell me I should be focusing on the teaching, I think I've got that covered ;)

Showing posts with label vintage. Show all posts
Showing posts with label vintage. Show all posts
Wednesday, May 16, 2012

Friday, March 23, 2012
My Itty Bitty Middy!
...in fact, it's a Middy plus.
I'm sure most of you know what the Middy haircut is; THE haircut worn in the 1940's, perfect for styling and the most versatile cut for the huge amount of different styles worn then. So thanks to the most knowledgeable of vintage gals who have the haircut, I discovered it and decided I wanted it.
Unfortunately, living in the heart of Melbourne has it's issues. I wasn't able to find a hairstylist who was able to understand my "look", knew what a Middy was, OR was able to translate this (very dated and slightly complicated for modern stylists) diagram.
I actually went into one hairstylist who told me that it was "okay" for me to have the look I had, and that he wasn't going to give me the middy, he was just going to give me an easy care cut for $30. I almost stormed out of there with the comments he was making to me, I was incredibly offended.
However, trawling through blogs I decided to look up any alternative hairdressers that Melbourne might have, thinking someone ANYONE in Melbourne must have been looking for a Middy. I mean, we aren't a small city.
Thank goodness for my new heroes, Wildilocks.
Wildilocks are an alternative hair salon that actually KNEW what a Middy was, and honestly, were the BEST experience getting my haircut I've ever had. Not only did the girl (I'm sorry sweetie I've forgotten your name) save my dead bleached hair (my ends were so beyond repair), she made sure that I knew exactly what she was going to do, how short it was going to be when it was curled, and she was genuinely concerned about how comfortable I was getting the cut. Not only was it an amazing experience, but she knew all about the Middy, and kept telling me all about it throughout the cutting.
So here is the middy straight; she styled it all lovely without curling it, because I told her I was going to pin curl it when I got home anyway, but then I left the salon in the wind and the rain and it kind of fell flat, so it looks rather messy:

Also messy, was my bad pin curl set, but you will get the idea of what it looks like when it's curled!

And here's the fantastic "U" shape, and how awesome it's going to look when I do a pageboy.

So if anybody is in Melbourne, I say head on over to Wildilocks, you will not be unhappy! Don't be dissapointed if your stylist won't do the Middy for you, I have hope you'll find someone who will. Just like I did (after months).
XOX,
Miss Kay.
I'm sure most of you know what the Middy haircut is; THE haircut worn in the 1940's, perfect for styling and the most versatile cut for the huge amount of different styles worn then. So thanks to the most knowledgeable of vintage gals who have the haircut, I discovered it and decided I wanted it.
Unfortunately, living in the heart of Melbourne has it's issues. I wasn't able to find a hairstylist who was able to understand my "look", knew what a Middy was, OR was able to translate this (very dated and slightly complicated for modern stylists) diagram.

I actually went into one hairstylist who told me that it was "okay" for me to have the look I had, and that he wasn't going to give me the middy, he was just going to give me an easy care cut for $30. I almost stormed out of there with the comments he was making to me, I was incredibly offended.
However, trawling through blogs I decided to look up any alternative hairdressers that Melbourne might have, thinking someone ANYONE in Melbourne must have been looking for a Middy. I mean, we aren't a small city.
Thank goodness for my new heroes, Wildilocks.
Wildilocks are an alternative hair salon that actually KNEW what a Middy was, and honestly, were the BEST experience getting my haircut I've ever had. Not only did the girl (I'm sorry sweetie I've forgotten your name) save my dead bleached hair (my ends were so beyond repair), she made sure that I knew exactly what she was going to do, how short it was going to be when it was curled, and she was genuinely concerned about how comfortable I was getting the cut. Not only was it an amazing experience, but she knew all about the Middy, and kept telling me all about it throughout the cutting.
So here is the middy straight; she styled it all lovely without curling it, because I told her I was going to pin curl it when I got home anyway, but then I left the salon in the wind and the rain and it kind of fell flat, so it looks rather messy:

Also messy, was my bad pin curl set, but you will get the idea of what it looks like when it's curled!

And here's the fantastic "U" shape, and how awesome it's going to look when I do a pageboy.

So if anybody is in Melbourne, I say head on over to Wildilocks, you will not be unhappy! Don't be dissapointed if your stylist won't do the Middy for you, I have hope you'll find someone who will. Just like I did (after months).
XOX,
Miss Kay.
Tuesday, February 07, 2012
Snappies and Dita.
Today I went off to check out Dita Von Teese's new lingerie line at Target. I am not the hugest fan of her anymore, as when I had black hair I got a tad sick of the comparisons to her and Amy Winehouse (dear lord) but I had high hopes for her lingerie line.
I was thoroughly disappointed with the whole range, especially when I found many other almost identical garments for $10 in Target's discounted racks (ha! Take that!)
I did expect a lot more from her, considering she is an icon for many women out there. The garters were flimsy, the bras were like every other bra I've seen out there, and the panties weren't high waisted enough to be flattering.
I decided not to purchase any, and get something that isn't mass-produced and of better quality. Sorry, Dita, the hype around it wasn't worth it.
I did however try out my new little thrifted knitted sweater, which I paired with my knee length navy pencil skirt and a pair of lovely warm stockings!
My hair is curled using sponge rollers on the sides and back and pin curls on the top.
Please excuse the terrible phone editing! iPhone's are awful for pictures, haha.
Xox
K.

I was thoroughly disappointed with the whole range, especially when I found many other almost identical garments for $10 in Target's discounted racks (ha! Take that!)
I did expect a lot more from her, considering she is an icon for many women out there. The garters were flimsy, the bras were like every other bra I've seen out there, and the panties weren't high waisted enough to be flattering.
I decided not to purchase any, and get something that isn't mass-produced and of better quality. Sorry, Dita, the hype around it wasn't worth it.
I did however try out my new little thrifted knitted sweater, which I paired with my knee length navy pencil skirt and a pair of lovely warm stockings!
My hair is curled using sponge rollers on the sides and back and pin curls on the top.
Please excuse the terrible phone editing! iPhone's are awful for pictures, haha.
Xox
K.
Wednesday, January 25, 2012
Wella White Lady Review.
Today I thought I'd post a blog entry about my current obsession with my hair colour.
Recently I've had to resort to my own devices by doing my own hair, as a family problem has led to being unable to get it done for free, and as getting it done by a hairdresser here in Australia is just ridiculously expensive, I've started Youtubing, Googling, and researching like crazy on how to bleach, tone, and dye my own hair properly.
I've bleached my own hair a few times since this post, and I won't be getting into that. If you are looking for answers on how to bleach your own hair at home, I suggest looking into some youtube videos, as I am far from a hair expert!
As many of you looking into doing your own hair white or grey have noticed, a trend amongst us do-it-at-home'ers seems to either be the toners by Manic Panic "Virgin Snow" or Wella's "White Lady" (Or T18, I believe).
I haven't bothered, and do not intend to try the Manic Panic, for personal reasons. However recently I went ahead and bought White Lady on eBay for around $12AUD (including postage), as for some reason you can't get it in shops like Hairhouse Warehouse here.
The packaging looks like this:

Australians, don't be afraid to buy this stuff online, it's definitely worth it!
Okay, so, after bleaching my hair, the instructions read that it is to be mixed with 20 Volume developer on a 1:2 ratio. One part of the Wella, two parts of the developer. I used the whole bottle, and used my mixing bowl as a measurement for the developer. I read online that it's advised to make sure that the mix is a very dark purple before you put it on your head, so I left it until it was around that colour, in fact it did change more when it was on my head, so if you think its purple enough, wait a couple of minutes more and it might change.
Once my hair was towel dried, I used my brush to evenly distribute it through my hair. I would also advise going from the ends of your hair to your roots if you are like me and went from a darker colour when bleaching, as my ends are STILL a slightly different colour to the top of my head. Sigh.
My hair was about the colour of the inside of a banana peel, possibly lighter when I applied this, and only left it in for about five minutes. I repeat, FIVE. MINUTES.
This stuff is POTENT, had I left it on my hair for any longer, I would have some seriously grey hair, or maybe even purple. And even now, my hair has a slight silvery tinge that should wash out to a more bright white.
I washed it out with cold water quickly, washed and conditioned my hair thoroughly. Make sure that the water running from your hair is clear before you finish rinsing.
The result:

My ends are very much a slightly different colour to the rest of my hair, but nothing a little purple shampoo can't take care of. Otherwise, this toner really evened out my hair colour, where I practically had two halves, which isn't nice when you are trying to achieve a classic colour!
And if anybody is interested, my purple shampoo is more a blue shampoo! From DeLorenzo and is called the "De Lorenzo Novafusion Silver Shampoo". I got it at Hairhouse Warehouse and although it is rather expensive, it is SO worth it to get rid of all your icky brassy, yellowy, just not cool tones to your blonde hair!
I really hope this might have encouraged some people to buy the Wella White Lady, as it really is the most fantastic colour, and so easily done.
Xox
K.
Recently I've had to resort to my own devices by doing my own hair, as a family problem has led to being unable to get it done for free, and as getting it done by a hairdresser here in Australia is just ridiculously expensive, I've started Youtubing, Googling, and researching like crazy on how to bleach, tone, and dye my own hair properly.
I've bleached my own hair a few times since this post, and I won't be getting into that. If you are looking for answers on how to bleach your own hair at home, I suggest looking into some youtube videos, as I am far from a hair expert!
As many of you looking into doing your own hair white or grey have noticed, a trend amongst us do-it-at-home'ers seems to either be the toners by Manic Panic "Virgin Snow" or Wella's "White Lady" (Or T18, I believe).
I haven't bothered, and do not intend to try the Manic Panic, for personal reasons. However recently I went ahead and bought White Lady on eBay for around $12AUD (including postage), as for some reason you can't get it in shops like Hairhouse Warehouse here.
The packaging looks like this:
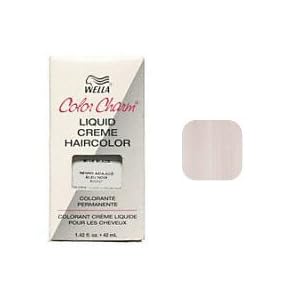
Australians, don't be afraid to buy this stuff online, it's definitely worth it!
Okay, so, after bleaching my hair, the instructions read that it is to be mixed with 20 Volume developer on a 1:2 ratio. One part of the Wella, two parts of the developer. I used the whole bottle, and used my mixing bowl as a measurement for the developer. I read online that it's advised to make sure that the mix is a very dark purple before you put it on your head, so I left it until it was around that colour, in fact it did change more when it was on my head, so if you think its purple enough, wait a couple of minutes more and it might change.
Once my hair was towel dried, I used my brush to evenly distribute it through my hair. I would also advise going from the ends of your hair to your roots if you are like me and went from a darker colour when bleaching, as my ends are STILL a slightly different colour to the top of my head. Sigh.
My hair was about the colour of the inside of a banana peel, possibly lighter when I applied this, and only left it in for about five minutes. I repeat, FIVE. MINUTES.
This stuff is POTENT, had I left it on my hair for any longer, I would have some seriously grey hair, or maybe even purple. And even now, my hair has a slight silvery tinge that should wash out to a more bright white.
I washed it out with cold water quickly, washed and conditioned my hair thoroughly. Make sure that the water running from your hair is clear before you finish rinsing.
The result:

My ends are very much a slightly different colour to the rest of my hair, but nothing a little purple shampoo can't take care of. Otherwise, this toner really evened out my hair colour, where I practically had two halves, which isn't nice when you are trying to achieve a classic colour!
And if anybody is interested, my purple shampoo is more a blue shampoo! From DeLorenzo and is called the "De Lorenzo Novafusion Silver Shampoo". I got it at Hairhouse Warehouse and although it is rather expensive, it is SO worth it to get rid of all your icky brassy, yellowy, just not cool tones to your blonde hair!
I really hope this might have encouraged some people to buy the Wella White Lady, as it really is the most fantastic colour, and so easily done.
Xox
K.
Wednesday, December 21, 2011
Pin Curling!
I remember many years ago when I first started researching how to pin curl; there really weren't as many resources for this hairstyle technique on the internet, or I just didn't know where to look! Either way, currently there are just so many YouTube videos, picture tutorials on blogs, and hairstylists websites and books at your advantage!
Here is a collection of different resources that I believe are IDEAL for the first time pin curler, and how helpful they are in the certain aspects of pin curling that you need to know. So off we go!
1. Lisa Freemont Street on YouTube and her blog Lisa Freemont Pages
This lady is definitely a vintage hairstyling guru; and one of the best I've found. She can be requested and can recreate just about any hairstyle that I've ever wondered 'Gee, how does that work?'
Her video on pin curling needs to be listened to completely, don't just skip over her talking, because she really does have some seriously good advice and ideas on pin curling that is very useful when you have no idea what your doing.
This video is rather old for her videos, and you can see her pin curling other styles in her many other videos, especially if you want a specific style in mind. She also has had many other videos with different lengths of hair; from short to long, and you are BOUND to find a video with your length of hair.
A few things I learned from Lisa Freemont Street:
- Using a spray bottle rather than straight out of the shower wet hair.
- When brushing out (Seen in Part 2 - I think she's got it linked in Part 1)I learnt in order to get the shape I want, to brush against the hand.
- Using Pin Curl Clips compared to bobby pins. I usually use a combination of both, simply because I don't have enough of pin curl clips - but bobby pins tend to distort the curl and sometimes I end up with almost zigzagged curls (oops!)
2. Vivid Makeup
This is my favorite video for the brushing out process; although I believe this woman has practically the greatest healthiest most wonderful hair ever. (getting rid of frizz is not fun with bleached, dry, unhealthy, constantly overworked hair)
This woman makes everything so clear and makes it very easy to understand!
Things I learned from Vivid Makeup
- Do NOT be afraid to brush too much through pin curls, they will stand through just about anything until you get the desired style!
- You will most likely get so much more frizz than her, I'm pretty sure she has magical hair, so PLEASE don't give up and keep BRUSHING!
3. Primped Preen N' Peachy
This girl is just adorable; and this video is so helpful, for people who have tried their first pin curl set and it didn't work out as well, or expert pin curlers who didn't get everything perfect (and who does?).
Things I learned from Primped Preen N' Peachy:
- When things don't go as well as you'd like; go with the curl direction, and don't go against it, it will work much better that way.
- Grabbing smaller sections rather than big chunks when you've messed up to brush.
 4. Vintage Hairstyling By Lauren Rennells
This book, is definitely a must-have for vintage enthusiasts. Lauren Rennells makes vintage hairstyling SO EASY, and although I knew a lot of what she put in the book already, I learnt a lot about heat styling rather than my beloved pin curls.
She does however, have an incredibly clear wonderful few pages on pin curling, directions for the curl, what happens when you brush, how to brush, what kind of brush, oh my, it's just too wonderful.
The images and everything in this book is just pure perfection, and if you don't go out and buy it right now, I'll go and cry a little bit for your loss.
You can buy the book from here.
Or read Rennells' blog 'The Bobby Pin Blog' here.
Do it. Do it now.
I hope this blog post was of some use to you, with these fabulous people and their expertise; they sure helped me!

xo
K.
Here is a collection of different resources that I believe are IDEAL for the first time pin curler, and how helpful they are in the certain aspects of pin curling that you need to know. So off we go!
1. Lisa Freemont Street on YouTube and her blog Lisa Freemont Pages
This lady is definitely a vintage hairstyling guru; and one of the best I've found. She can be requested and can recreate just about any hairstyle that I've ever wondered 'Gee, how does that work?'
Her video on pin curling needs to be listened to completely, don't just skip over her talking, because she really does have some seriously good advice and ideas on pin curling that is very useful when you have no idea what your doing.
This video is rather old for her videos, and you can see her pin curling other styles in her many other videos, especially if you want a specific style in mind. She also has had many other videos with different lengths of hair; from short to long, and you are BOUND to find a video with your length of hair.
A few things I learned from Lisa Freemont Street:
- Using a spray bottle rather than straight out of the shower wet hair.
- When brushing out (Seen in Part 2 - I think she's got it linked in Part 1)I learnt in order to get the shape I want, to brush against the hand.
- Using Pin Curl Clips compared to bobby pins. I usually use a combination of both, simply because I don't have enough of pin curl clips - but bobby pins tend to distort the curl and sometimes I end up with almost zigzagged curls (oops!)
2. Vivid Makeup
This is my favorite video for the brushing out process; although I believe this woman has practically the greatest healthiest most wonderful hair ever. (getting rid of frizz is not fun with bleached, dry, unhealthy, constantly overworked hair)
This woman makes everything so clear and makes it very easy to understand!
Things I learned from Vivid Makeup
- Do NOT be afraid to brush too much through pin curls, they will stand through just about anything until you get the desired style!
- You will most likely get so much more frizz than her, I'm pretty sure she has magical hair, so PLEASE don't give up and keep BRUSHING!
3. Primped Preen N' Peachy
This girl is just adorable; and this video is so helpful, for people who have tried their first pin curl set and it didn't work out as well, or expert pin curlers who didn't get everything perfect (and who does?).
Things I learned from Primped Preen N' Peachy:
- When things don't go as well as you'd like; go with the curl direction, and don't go against it, it will work much better that way.
- Grabbing smaller sections rather than big chunks when you've messed up to brush.
 4. Vintage Hairstyling By Lauren Rennells
 This book, is definitely a must-have for vintage enthusiasts. Lauren Rennells makes vintage hairstyling SO EASY, and although I knew a lot of what she put in the book already, I learnt a lot about heat styling rather than my beloved pin curls.
She does however, have an incredibly clear wonderful few pages on pin curling, directions for the curl, what happens when you brush, how to brush, what kind of brush, oh my, it's just too wonderful.
The images and everything in this book is just pure perfection, and if you don't go out and buy it right now, I'll go and cry a little bit for your loss.
You can buy the book from here.
Or read Rennells' blog 'The Bobby Pin Blog' here.
Do it. Do it now.
I hope this blog post was of some use to you, with these fabulous people and their expertise; they sure helped me!

xo
K.
Home Is Where The Heart Is
Hi all! I have updated my blog seriously, as I have decided to revamp the look, work it and start adding more to it! So hopefully I start receiving a lot more love over here as I start paying more attention to it!
Today myself and my dear sweetheart went for a walk around our town, looking around at all the historic architecture, checking out our neighbours Christmas decorations.
We ended up taking a few outfit photos, where I got all christmasy in my colours!


We were giddily interrupted by a couple of lovely friendly border collies, who skipped on over to see what we were doing, wagging their tails happily.


I do so miss my beautiful Tigger, he is the happiest little king charles/beagle you'll ever meet. I do love animals very much, and not being able to have them around in a rental home is getting hard for me to deal with. But we must sacrifice things we love, I guess!
The pinafore trousers I am wearing are from Vivien of Holloway and I've blogged about them before. I bought them many months ago when they were on sale, and they really are comfortable and beautiful garments. I do assure short girls that I'd want to make sure that you shouldn't worry about the length of the legs and straps for the arms, as everything else fits me but those- the length in the legs for short girls is RIDICULOUS, and if you are like me, you need a little help keeping the straps on your arms! A little altering won't stop you enjoying your pinafore trousers though; they are just so easily put on with a cute top underneath to look vintage without even trying.
Looking vintage isn't really that hard, it's just all about finding pieces that ladies would have worn in the era you have warmed to the most. These trousers are actually made from 1950's patterns, so they are in the exact size that ladies would have had back then- a pre-warning, don't feel huge if you are buying a size above what you normally get, as the waists on these are teeny tiny as you can see in my photographs!
I hope you ladies and gents are having a wonderful Christmas and New Year! Our little tree says hello to yours!
xoxoxo
K.
Today myself and my dear sweetheart went for a walk around our town, looking around at all the historic architecture, checking out our neighbours Christmas decorations.
We ended up taking a few outfit photos, where I got all christmasy in my colours!


We were giddily interrupted by a couple of lovely friendly border collies, who skipped on over to see what we were doing, wagging their tails happily.


I do so miss my beautiful Tigger, he is the happiest little king charles/beagle you'll ever meet. I do love animals very much, and not being able to have them around in a rental home is getting hard for me to deal with. But we must sacrifice things we love, I guess!
The pinafore trousers I am wearing are from Vivien of Holloway and I've blogged about them before. I bought them many months ago when they were on sale, and they really are comfortable and beautiful garments. I do assure short girls that I'd want to make sure that you shouldn't worry about the length of the legs and straps for the arms, as everything else fits me but those- the length in the legs for short girls is RIDICULOUS, and if you are like me, you need a little help keeping the straps on your arms! A little altering won't stop you enjoying your pinafore trousers though; they are just so easily put on with a cute top underneath to look vintage without even trying.
Looking vintage isn't really that hard, it's just all about finding pieces that ladies would have worn in the era you have warmed to the most. These trousers are actually made from 1950's patterns, so they are in the exact size that ladies would have had back then- a pre-warning, don't feel huge if you are buying a size above what you normally get, as the waists on these are teeny tiny as you can see in my photographs!
I hope you ladies and gents are having a wonderful Christmas and New Year! Our little tree says hello to yours!
xoxoxo
K.
Subscribe to:
Posts (Atom)